Welcome! See Italy (and more) through the eyes of an artist: American sculptor and painter Kelly Borsheim creates her life and art in Italy and shares her adventures in travel and art with you. Come on along, please and Visit her fine art work online at: www.BorsheimArts.com
Friday, January 18, 2008
Olive Oil
Hey you!
I generally think of food as a sometimes-pleasant diversion of necessity. Yes, I realize that is blasphemous for some, but . . . I mean, I like a great tasting and smelling meal, especially when shared with a friend, but I am not too difficult to please in this area. And I generally prefer working to cooking.
However, for some reason, my friends here in Italia seem to be more interested in food than I ever noticed people being before. Maybe it is because when I am living in the country in Texas, I spend most of my time alone; whereas living in the city of Florence, Italy, I have easy access to a whole lot more people. Is this normal – so much time going into the preparation of food? Yes, I suspect it has been for centuries now.
And, while I liked eating olive oil before, I am now in the country famous for its love of all things olive. I took this image tonight at the Coop (grocery store) just outside of Porta Beccaria in Florence. It shows that there are lots more olive oils available than I ever saw in the States before. Here in Tuscana, they really celebrate the new crop each fall. Good fresh olive oil is green, not yellow. Italians eat it on everything. In fact, I remember my Italian friend Grazia offering me some melanzana (eggplant) one evening and then giving me an odd look of disbelief mixed with disapproval because I was too lazy to add olive oil.
I love it now – and am learning the joys of adding it to practically everything I eat now.
Buon appetito!
Wednesday, January 16, 2008
Drawing in Charcoal
I love the look of charcoal drawings. When done well, they look so soft and touchable. On my blog entry from 14 January 2008, I showed you one of my charcoal “cast drawings” of an ear.
Here I include two detail images of this drawing so that you may get an idea of what it feels like to put your face inches away from a charcoal. From a small distance away, one can see the image as the artist intended. But up close, the artwork looks amazingly grainy and, in the case of the image of the upper ear, line-y.
The Roma paper has a grid texture to it, the tooth that holds the charcoal. This art form consists of adding only darks to a light paper. There are no “white charcoals” really. In the dark areas, one can apply carboncino (‘charcoal’ in Italian) in such a way that the lines disappear. But in the light areas, there is nothing to be done since a physical ridge creates a shadow that cannot be lightened. Però, I rather enjoy the totally not smooth or perfect artwork – reminds me that human hands were at work, making the paper and creating the image.
I tend to jokingly refer to this close-up view as “dirt on paper,” although most times, I am using the term in a derogatory way to refer to my own dissatisfaction at my current inability to create a successful illusion. Some people tell me that I am too hard on myself, but in truth, it is this quest to improve that keeps me interested in art. One goal is to have the viewer be amazed by the image, but not necessarily have the thought of what the materials are. If you think of paper and charcoal when you see my image, perhaps I have failed to wow and woo you.
Pencil Portrait Sketch of Harry
My recent attempt at portraiture is this small sketch of my friend Harry. I am working on basic drawing paper of a light yellow crème color and sketching with a pencil. He has such a great face, especially for sculpture. And while he is being a sport about this – holds very still!!! -- I am not sure he would want to pose for 3-d art. Next Monday evening, I will try to refine this drawing.
.
Monday, January 14, 2008
Sight Size Method of Drawing
One goal of some 2-dimensional artists is to try to create the illusion of 3-dimensions on their flat surface. It is done with tone, the relative range of a color from lights to darks.
In these images of my study in charcoal of a plaster sculpture cast of an ear, you can see my basic set-up, as well as the finished work. I used the Sight Size Method of Drawing to create this cast. In this case, my easel with board and Roma charcoal paper are placed directly next to the subject I am drawing – namely, a white plaster cast of a sculpted ear hung on a grey board. One light falls on both original and drawing.
In the Sight Size Method, I actually make my observations from about two meters away. Then I walk up to my paper and make a mark. Backing up again to my same spot (which is marked by tape on the floor), I check my mark before approaching again to make the next one. It is a lot of pacing, but with my energy level, this tends to be calming for me. However, it does take getting used to because you must keep your eye on the intended target on the paper as you move in, knowing that as you approach the paper, your point of view will change and so will the perceived location of your intended mark.
With the Sight Size Method, the idea is to place the easel so that the drawn image lines up horizontally with the subject being portrayed. In this case, I want to make a drawing that is 100% the size of the original, so I must place my drawing surface on the same vertical plane as the original. If I were drawing from a live model and wanted to draw a figure smaller than life size, my easel would be moved much closer to my viewing position until my intended size appeared to be the same size as the actual model. And I would horizontally align the bottom of the model’s feet to the bottom of my drawing’s feet. I would then align the head of the model with the head of my drawing. And then draw, continuing to record these kinds of relationships.
Anyway, there is more to it than that, but I hope you understand the basic concept. You may be interested to note that I was unable to get my camera’s tripod high enough to mimic what my eye saw while creating this charcoal drawing. In the photograph, I am actually looking UP at the cast. The viewpoint is different from the one that I drew. And, for the close-up “final drawing” shot, I lowered the drawing on the easel to photograph it by itself. That means that the light source was that much further away, meaning that my drawing is seen with less light on it. The tones will not appear to match the original object, not only because of the limitations of photography, but also because of the paper. The Roma paper is simply not as white as the plaster cast original. And the compressed charcoal (used in the cast shadow) cannot get as dark as the real object’s shadow. Hence, in my drawing, the tones are compressed because of the limited range of the materials used.
It may also interest you that since I am in Italy studying design, including seeing real forms in the terms of abstract shapes, I do not see my drawing as depicting an ear. On one level, of course, I know that I have drawn an ear. But for a long time now, all I have been able to register in my brain are abstract shapes, such as the bird, a distorted infinity sign, and a comma turned 90 degrees.
Now, all I need to do is find an ear doctor who would like to purchase this drawing for the office! (Oh, and sign the work . . . )
Sunday, January 13, 2008
Drawing and Gesture Sketch
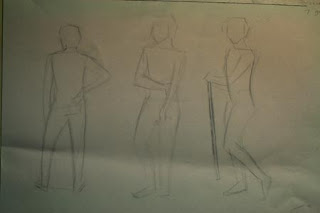
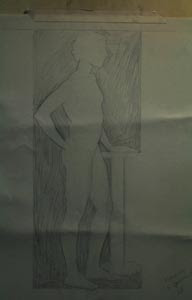
During the mornings of this past week I have spent my time creating drawing studies of an Italian model named Francesco. I will begin on Monday to create a 5-week charcoal drawing of him. It seems almost backwards to spend a couple of hours perfecting a gesture sketch, which by its nature implies speed. However, if the idea or emotion is not captured early on in an artwork, there is really no point in continuing. How one begins sets the tone for the rest of the project.
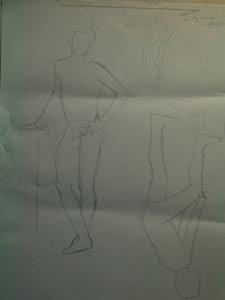
Here you can see some of my gesture sketches. I went into Photoshop to increase the contrast a bit so that you may see my light, sketchy lines better. It is meglio to draw light lines in the beginning so that one feels free to change the disegno. This is the time to make the major design decisions. Shapes, patterns, angles, variety, gesture: I must use these elements to create un disegno that conveys an idea worth viewing.
The image of the figure in the dark box shape is actually an exercise in drawing the negative spaces, the shapes around the object depicted [which is considered the positive space]. I first created a simple gesture sketch to help me place each negative shape in context with the next so that as I worked, the figure emerged. Then I draw each shape that is not the figure, shading it in order to see it better.
It is in the refinement in the drawing of the negative spaces that the articulation of the figure is created or added. My beginning sketch of the figure consisted only of “C” and “S” curves. No articulation (breaking down the specific components of a form within the gesture, as well as the addition of architecture).
Before creating the drawing you see here, I randomly drew various negative shapes from several poses, without relating them to one another. The exercise was not to draw the legs, but to draw the shape between the legs – a personality all to itself! The main observation is that all relationships give us information about our subject’s character and we must not forget to note the less obvious around us.
Click here for more Information about drawing with Romance and Architecture)
Subscribe to:
Posts (Atom)